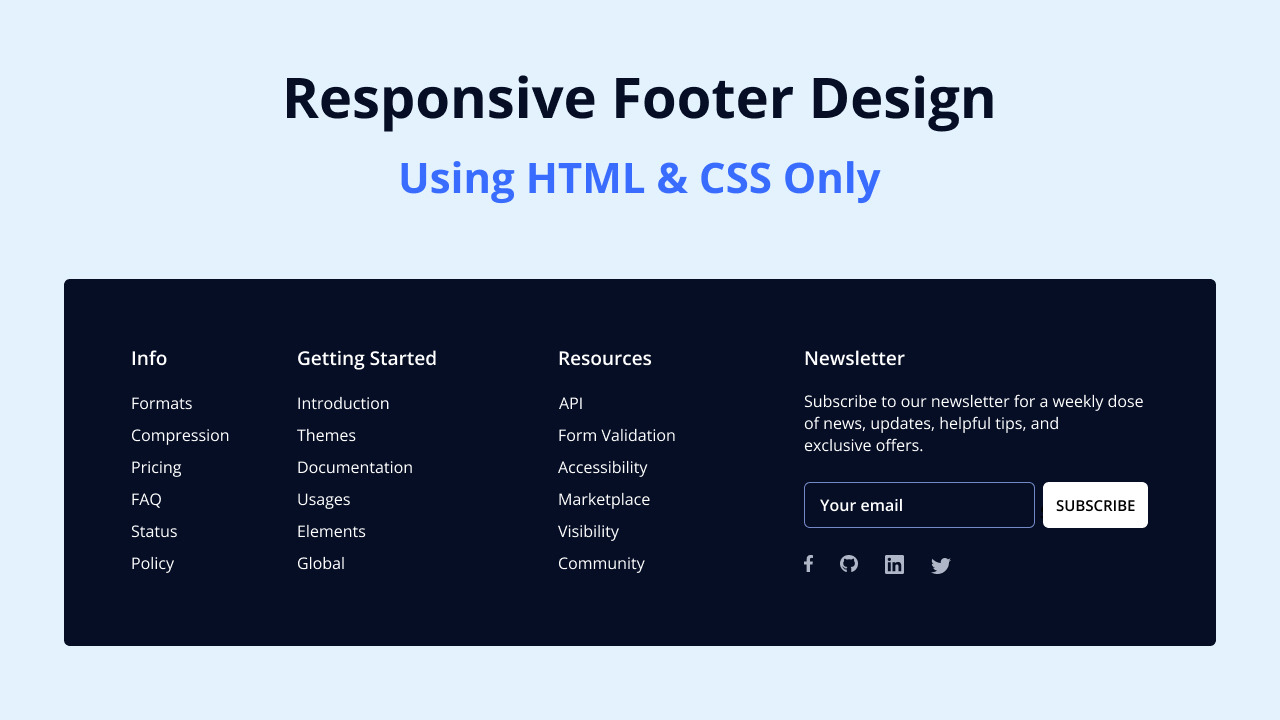
You’ve probably seen footers on almost every website you’ve visited. The footer is a crucial section of a website that appears at the bottom of every page. It usually contains links to important pages and copyright information.
In this blog post, I’ll show you how to make a responsive footer using HTML and CSS. It’s a simple but great project for beginners, helping you understand how to set up a footer layout with HTML and give it a stylish, responsive design with CSS.
To create a footer, we will use commonly used HTML elements like footer, h4, ul, li, a, and button, along with some basic CSS properties to style and make the footer responsive. So you should have no trouble following along and understanding the codes.
Steps to Create Responsive Footer in HTML and CSS
To create a responsive footer using HTML and CSS, follow these simple step-by-step instructions:
- First, create a folder with any name you like. Then, make the necessary files inside it.
- Create a file called
index.htmlto serve as the main file. - Create a file called
style.cssfor the CSS code.
To start, add the following HTML codes to your index.html file: This code includes essential HTML markup with different semantic tags like footer, h4, form, input, p, li, and buttons, which are used to create our footer layout.
<!DOCTYPE html>
<!-- Coding By CodingNepal - www.codingnepalweb.com -->
<html lang="en">
  <head>
    <meta charset="UTF-8" />
    <meta name="viewport" content="width=device-width, initial-scale=1.0" />
    <title>Responsive Footer HTML and CSS | CodingNepal</title>
    <!-- Fonts Links For Icon -->
    <link rel="stylesheet" href="https://cdnjs.cloudflare.com/ajax/libs/font-awesome/6.4.2/css/all.min.css" />
    <link rel="stylesheet" href="style.css" />
  </head>
  <body>
    <section class="footer">
      <div class="footer-row">
        <div class="footer-col">
          <h4>Info</h4>
          <ul class="links">
            <li><a href="#">About Us</a></li>
            <li><a href="#">Compressions</a></li>
            <li><a href="#">Customers</a></li>
            <li><a href="#">Service</a></li>
            <li><a href="#">Collection</a></li>
          </ul>
        </div>

        <div class="footer-col">
          <h4>Explore</h4>
          <ul class="links">
            <li><a href="#">Free Designs</a></li>
            <li><a href="#">Latest Designs</a></li>
            <li><a href="#">Themes</a></li>
            <li><a href="#">Popular Designs</a></li>
            <li><a href="#">Art Skills</a></li>
            <li><a href="#">New Uploads</a></li>
          </ul>
        </div>

        <div class="footer-col">
          <h4>Legal</h4>
          <ul class="links">
            <li><a href="#">Customer Agreement</a></li>
            <li><a href="#">Privacy Policy</a></li>
            <li><a href="#">GDPR</a></li>
            <li><a href="#">Security</a></li>
            <li><a href="#">Testimonials</a></li>
            <li><a href="#">Media Kit</a></li>
          </ul>
        </div>

        <div class="footer-col">
          <h4>Newsletter</h4>
          <p>
            Subscribe to our newsletter for a weekly dose
            of news, updates, helpful tips, and
            exclusive offers.
          </p>
          <form action="#">
            <input type="text" placeholder="Your email" required>
            <button type="submit">SUBSCRIBE</button>
          </form>
          <div class="icons">
            <i class="fa-brands fa-facebook-f"></i>
            <i class="fa-brands fa-twitter"></i>
            <i class="fa-brands fa-linkedin"></i>
            <i class="fa-brands fa-github"></i>
          </div>
        </div>
      </div>
    </section>
  </body>
</html>
Next, add the following CSS codes to your style.css file to make your footer beautiful and responsive. You can experiment with different CSS properties like colors, fonts, and backgrounds to give a personalized touch to your footer. Now, if you load the web page in your browser, you can see your footer design.
/* Importing Google font - Open Sans */
@import url('https://fonts.googleapis.com/css2?family=Open+Sans:wght@300;400;500;600;700&display=swap');

* {
  margin: 0;
  padding: 0;
  box-sizing: border-box;
  font-family: 'Open Sans', sans-serif;
}

.footer {
  position: absolute;
  top: 50%;
  left: 50%;
  transform: translate(-50%, -50%);
  max-width: 1280px;
  width: 95%;
  background: #10182F;
  border-radius: 6px;
}

.footer .footer-row {
  display: flex;
  flex-wrap: wrap;
  justify-content: space-between;
  gap: 3.5rem;
  padding: 60px;
}

.footer-row .footer-col h4 {
  color: #fff;
  font-size: 1.2rem;
  font-weight: 400;
}

.footer-col .links {
  margin-top: 20px;
}

.footer-col .links li {
  list-style: none;
  margin-bottom: 10px;
}

.footer-col .links li a {
  text-decoration: none;
  color: #bfbfbf;
}

.footer-col .links li a:hover {
  color: #fff;
}

.footer-col p {
  margin: 20px 0;
  color: #bfbfbf;
  max-width: 300px;
}

.footer-col form {
  display: flex;
  gap: 5px;
}

.footer-col input {
  height: 40px;
  border-radius: 6px;
  background: none;
  width: 100%;
  outline: none;
  border: 1px solid #7489C6 ;
  caret-color: #fff;
  color: #fff;
  padding-left: 10px;
}

.footer-col input::placeholder {
  color: #ccc;
}

 .footer-col form button {
  background: #fff;
  outline: none;
  border: none;
  padding: 10px 15px;
  border-radius: 6px;
  cursor: pointer;
  font-weight: 500;
  transition: 0.2s ease;
}

.footer-col form button:hover {
  background: #cecccc;
}

.footer-col .icons {
  display: flex;
  margin-top: 30px;
  gap: 30px;
  cursor: pointer;
}

.footer-col .icons i {
  color: #afb6c7;
}

.footer-col .icons i:hover  {
  color: #fff;
}

@media (max-width: 768px) {
  .footer {
    position: relative;
    bottom: 0;
    left: 0;
    transform: none;
    width: 100%;
    border-radius: 0;
  }

  .footer .footer-row {
    padding: 20px;
    gap: 1rem;
  }

  .footer-col form {
    display: block;
  }

  .footer-col form :where(input, button) {
    width: 100%;
  }

  .footer-col form button {
    margin: 10px 0 0 0;
  }
}
Conclusion and final words
In conclusion, as a beginner in web development, creating a stylish footer using HTML and CSS is a simple but rewarding web project. The skills you gained can be used to create various components of a website, such as login forms, navigation bars, home pages, and cards.
If you encounter any problems while creating your footer, you can download the source code files for this footer project for free by clicking the Download button. Additionally, you can view a live demo of it by clicking the View Live button.


