Did you know that you can convert any text into a file and download it in different formats like txt, html, css, docs, ppt, etc using vanilla JavaScript? If your answer is no then this blog is for you.
Hey friends, today in this blog, you’ll learn to create a simple but useful project and that is how to save webpage content as a file using HTML CSS & JavaScript. Earlier, I shared a blog on how to Convert Text to Speech in JavaScript, and this time I want to show you how to convert text to file and download it with JavaScript. So, let’s get started with the project.
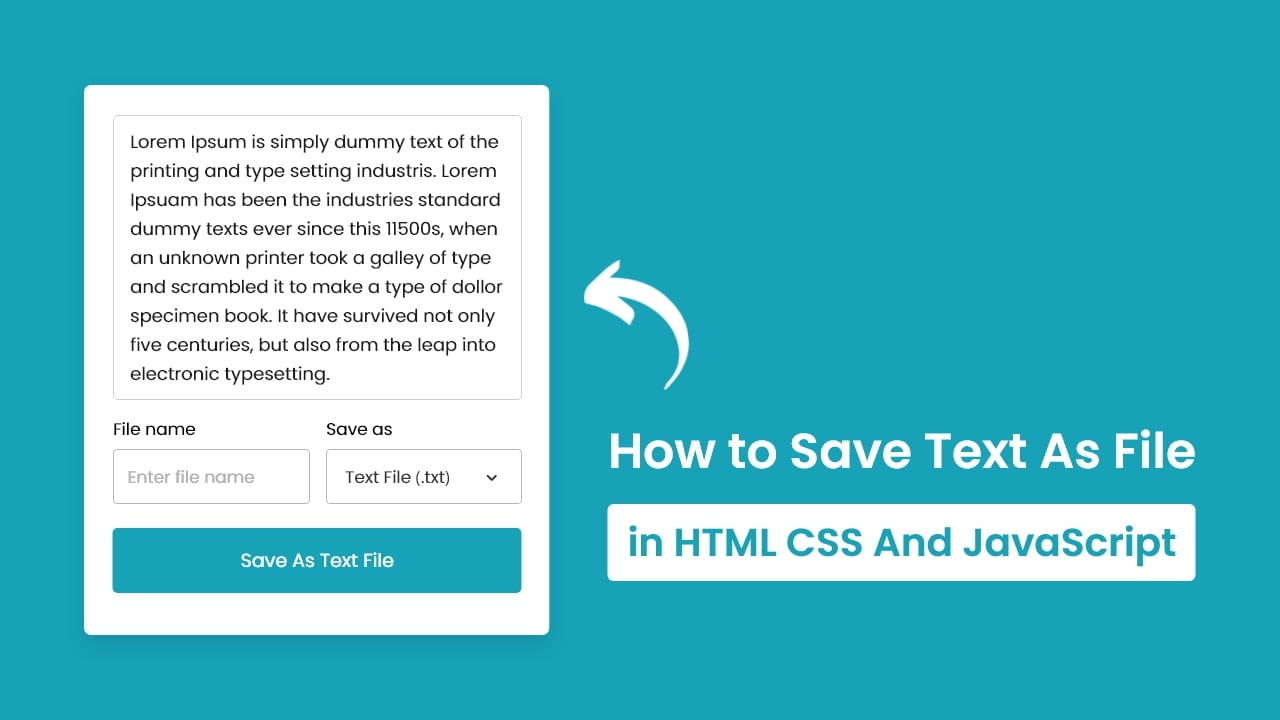
As you have seen in the preview image, in this project, there is a text box, an input box, select options, and a save button. When you type some text into the text box, select the file format, and hit the “save” button, a new file will be saved on your computer with the entered text in it. The file name is not mandatory and if you don’t give it, the file will be saved with a unique name.
If you’re curious to view a live demo of this project then check it out here. For a demo or a full video tutorial of this project (Save Text As File), you can watch the given YouTube video.
Video Tutorial of Save Text As File in JavaScript
In the above video, you’ve seen a demo of how to save the text as a file and how I created it using HTML CSS & JavaScript. I hope you’ve watched the video till the end and also learned something new from it.
If you liked this project and want to get the source codes or files, you can easily get them from the bottom of this page. But before that make sure you watched the video and understand the codes or methods properly else you might get confused later on while implementing that code in your projects.
You may like these projects:
- Download Any File From URL
- Tags Input Box in JavaScript
- QR Code Generator in JavaScript
- Price Range Slider in JavaScript
Save Text As File in JavaScript [Source Codes]
To create this project (Save Text As File in JavaScript), first, you need to create three files – HTML, CSS & JavaScript file and paste the given codes into your file one by one. If you don’t know how to create these files or what to do or don’t want to do it, you can download the source code files of this project by clicking on the given download button that is bottom of this page.
First, create an HTML file with the name index.html and paste the given codes into your HTML file. Remember, you’ve to create a file with a .html extension.
<!DOCTYPE html>
<!-- Coding By CodingNepal - youtube.com/codingnepal -->
<html lang="en" dir="ltr">
  <head>
    <meta charset="utf-8">
    <title>Save Text As File JavaScript | CodingNepal</title>
    <link rel="stylesheet" href="style.css">
    <meta name="viewport" content="width=device-width, initial-scale=1.0">
    <script src="script.js" defer></script>
  </head>
  <body>
    <div class="wrapper">
      <textarea spellcheck="false" placeholder="Enter something to save" required>Lorem Ipsum is simply dummy text of the printing and type setting industry. Lorem Ipsuam has been the industries standard dummy texts ever since this 1500s, when an unknown printer took a galley of type and scrambled it to make a type of dollar specimen book. It have survived not only five centuries, but also from the leap into electronic typesetting.</textarea>
      <div class="file-options">
        <div class="option file-name">
          <label>File name</label>
          <input type="text" spellcheck="false" placeholder="Enter file name">
        </div>
        <div class="option save-as">
          <label>Save as</label>
          <div class="select-menu">
            <select>
              <option value="text/plain">Text File (.txt)</option>
              <option value="text/javascript">JS File (.js)</option>
              <option value="text/html">HTML File (.html)</option>
              <option value="image/svg+xml">SVG File (.svg)</option>
              <option value="application/msword">Doc File (.doc)</option>
              <option value="application/vnd.ms-powerpoint">PPT File (.ppt)</option>
            </select>
          </div>
        </div>
      </div>
      <button class="save-btn" type="button">Save As Text File</button>
    </div>
  </body>
</html>
Second, create a CSS file with the name style.css and paste the given codes into your CSS file. Remember, you’ve to create a file with a .css extension.
/* Import Google font - Poppins */
@import url('https://fonts.googleapis.com/css2?family=Poppins:wght@400;500;600&display=swap');
*{
  margin: 0;
  padding: 0;
  box-sizing: border-box;
  font-family: 'Poppins', sans-serif;
}
body{
  display: flex;
  align-items: center;
  justify-content: center;
  min-height: 100vh;
  padding: 10px;
  background: #17A2B8;
}
.wrapper{
  width: 443px;
  border-radius: 7px;
  background: #fff;
  padding: 30px 25px 40px;
  box-shadow: 0 10px 15px rgba(0,0,0,0.05);
}
.wrapper :where(textarea, input, select, button){
  width: 100%;
  outline: none;
  border: none;
  font-size: 17px;
  border-radius: 5px;
}
.wrapper :where(textarea, input)::placeholder{
  color: #aaa;
}
.wrapper :where(textarea, input):focus{
  box-shadow: 0px 2px 4px rgba(0,0,0,0.08);
}
.wrapper textarea{
  height: 270px;
  resize: none;
  padding: 8px 13px;
  font-size: 17.6px;
  border: 1px solid #ccc;
}
.wrapper .file-options{
  display: flex;
  margin-top: 10px;
  align-items: center;
  justify-content: space-between;
}
.file-options .option{
  width: calc(100% / 2 - 8px);
}
.option label{
  font-size: 17px;
}
.option :where(input, .select-menu){
  height: 50px;
  padding: 0 13px;
  margin-top: 6px;
  border-radius: 5px;
  border: 1px solid #bfbfbf;
}
.option .select-menu select{
  height: 50px;
  background: none;
}
.wrapper .save-btn{
  color: #fff;
  cursor: pointer;
  opacity: 0.6;
  padding: 16px 0;
  margin-top: 20px;
  pointer-events: none;
  background: #17A2B8;
}
.save-btn:hover{
  background: #148c9f;
}
textarea:valid ~ .save-btn{
  opacity: 1;
  pointer-events: auto;
  transition: all 0.3s ease;
}

@media screen and (max-width: 475px) {
  .wrapper{
    padding: 25px 18px 30px;
  }
  .wrapper :where(textarea, input, select, button, label){
    font-size: 16px!important;
  }
  .file-options .option{
    width: calc(100% / 2 - 5px);
  }
  .option :where(input, .select-menu){
    padding: 0 10px;
  }
  .wrapper .save-btn{
    padding: 15px 0;
  }
}
Last, create a JavaScript file with the name script.js inside js folder and paste the given codes into your JavaScript file. Remember, you’ve to create a file with a .js extension.
const textarea = document.querySelector("textarea"),
fileNameInput = document.querySelector(".file-name input"),
selectMenu = document.querySelector(".save-as select"),
saveBtn = document.querySelector(".save-btn");

selectMenu.addEventListener("change", () => {
    const selectedFormat = selectMenu.options[selectMenu.selectedIndex].text;
    saveBtn.innerText = `Save As ${selectedFormat.split(" ")[0]} File`;
});

saveBtn.addEventListener("click", () => {
    const blob = new Blob([textarea.value], {type: selectMenu.value});
    const fileUrl = URL.createObjectURL(blob);
    const link = document.createElement("a");
    link.download = fileNameInput.value;
    link.href = fileUrl;
    link.click();
});
That’s all, now you’ve successfully created a project about How to Save Text As a File in HTML CSS & JavaScript. If your code doesn’t work or you’ve faced any problems, please download the source code files from the given download button. It is free and a zip file will be downloaded that contains the project folder with source code files.


